Nov 25, 2025
How to create a custom signup form in Lovable + Supabase

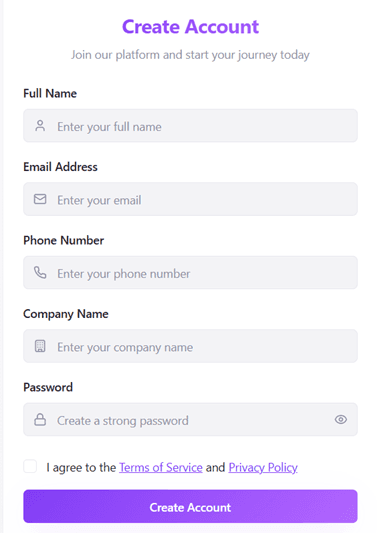
By default, Supabase only provides email and password fields. In this guide, you'll learn how to add extra fields like Full Name, Phone Number, and Company Name to your Lovable signup form — and store them properly in your Supabase database.
Step 1: Create a Signup Form
You can quickly generate your signup form UI through Lovable's chat setup. Use this prompt:
💡 Feel free to adjust this prompt to match your project's specific needs.
Step 2: Ensure Supabase Is Connected
Before continuing, make sure Supabase is properly connected to Lovable:
Click the Supabase icon in your Lovable project.
Confirm that your project is successfully linked.


Step 3: Add and Handle Extra Fields
Supabase's default signup process doesn't include fields beyond email and password. To handle extra data (Full name, Email, Phone number, Company name), enter this prompt in the Lovable chat:
This ensures each registered user gets a new entry in the profiles table, linked to their unique user_id.
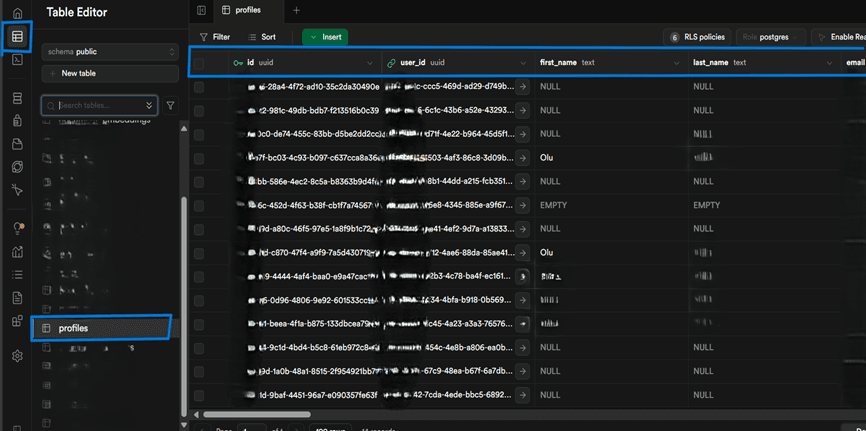
Step 4: Verify Your Data in Supabase
Once users start signing up, confirm their details in your database:
Click the Supabase icon in your Lovable dashboard.
Select the connected database name
On the left sidebar, click Table Editor.
Locate and open the profiles table to view all stored user details.
Still Stuck? Get Expert Help
Don't waste hours trying to figure it out alone. Connect with a vetted developer who can help you get unstuck and move forward with your project.