Nov 25, 2025
How to integrate stripe in Lovable project

Accepting payments in your Lovable project has never been easier! This guide walks you through connecting Stripe, Lovable, and Supabase — so you can start collecting payments like a pro.
Step 1: Set Up Your Stripe Account
Go to stripe.com and create a free account (or sign in if you already have one).
Navigate to the Developers section → API Keys.
You'll find two keys
Publishable key – used on the frontend (public)
Secret key – used on the backend (private)

Step 2: Connect Stripe to Your Lovable Project
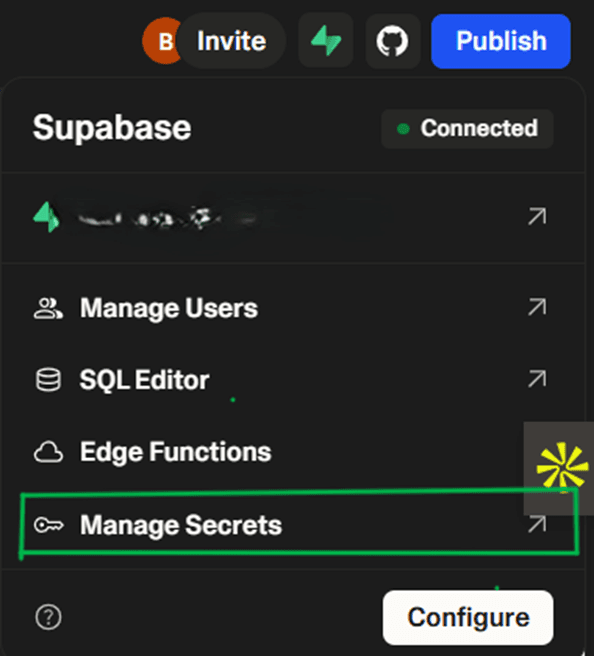
Click the Supabase icon again and choose Manage Secrets.
Click "Add New Secret" and enter:
Name:
STRIPE_SECRET_KEYValue:
sk_test_...
(Optional) Add your publishable key:
Name:
STRIPE_PUBLISHABLE_KEYValue:
pk_test_...Click Save.

Step 4: Describe What You're Building
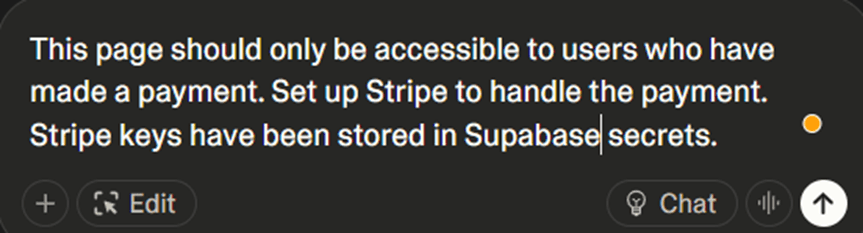
Lovable's AI-powered chat setup makes it simple to create backend flows. Just describe what you want to build.
Step 5: Run a Test Transaction
Open your Lovable website and try to purchase a product or service. On the payment screen, use this Stripe test card:
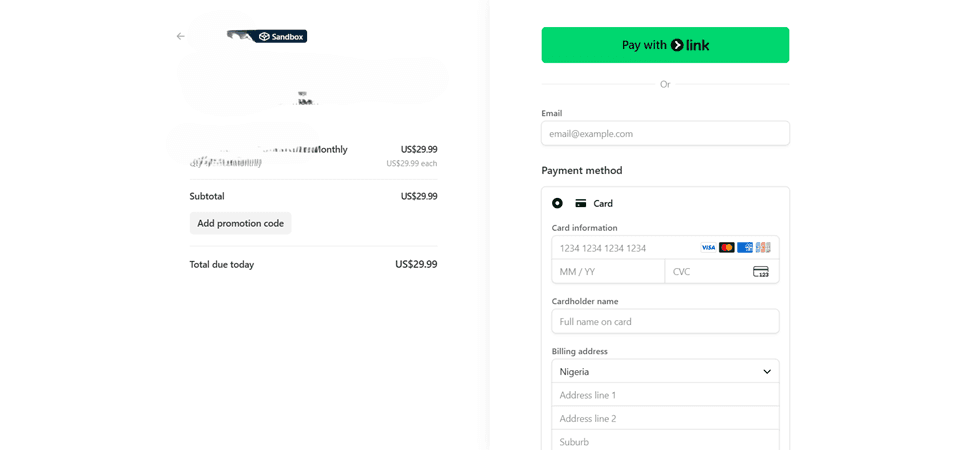
Once done, go to your Stripe Dashboard → Payments to confirm your test payment.
Step 6: Go Live and Accept Real Payments
In Stripe, activate your account by providing your business information.
Go to Developers → API Keys and switch to Live Mode.
Copy your new keys:
Publishable key →
pk_live_...Secret key →
sk_live_...
In Supabase → Manage Secrets, delete your test keys and replace them with your live ones.
Run a real payment and confirm it appears in your live Stripe dashboard.
💰 You can refund live payments directly from your Stripe dashboard anytime.
Step 7: Store Payment Details in Supabase
To store user payment details automatically, simply tell Lovable's chat:
This helps you manage subscribers, premium users, or payment histories inside your database.
✨ You're Done!
You've successfully integrated Stripe into your Lovable project using Supabase as your backend. Now you can:
Accept secure payments 🔒
Track transactions in real time 💸
Store user data seamlessly in Supabase 🧾
Still Stuck? Get Expert Help
Don't waste hours trying to figure it out alone. Connect with a vetted developer who can help you get unstuck and move forward with your project.